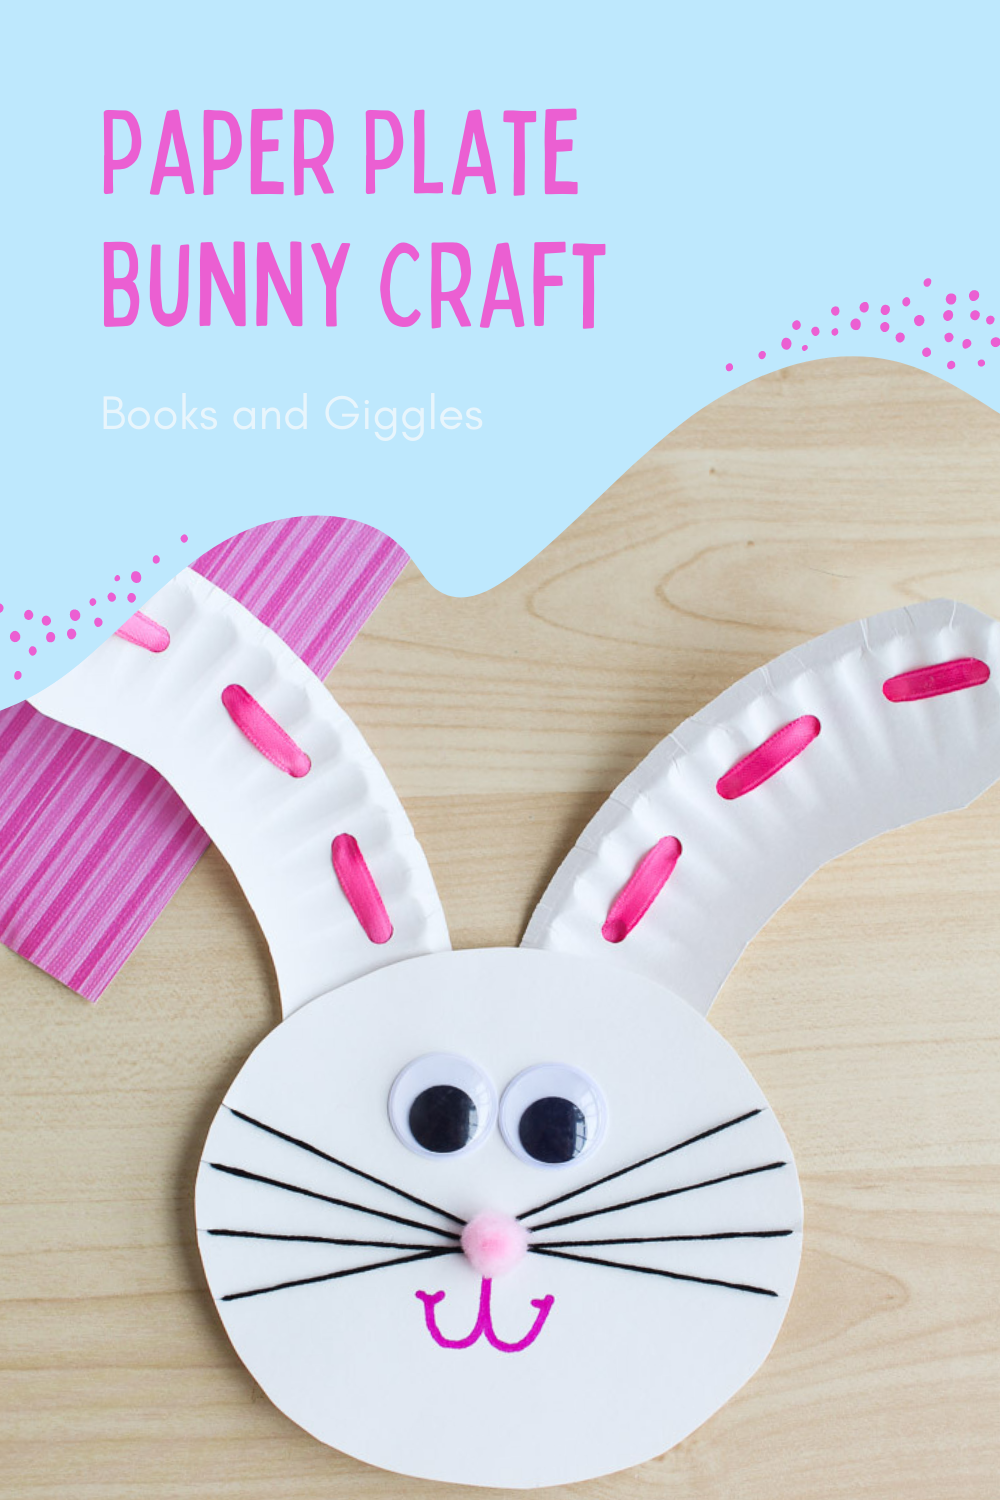
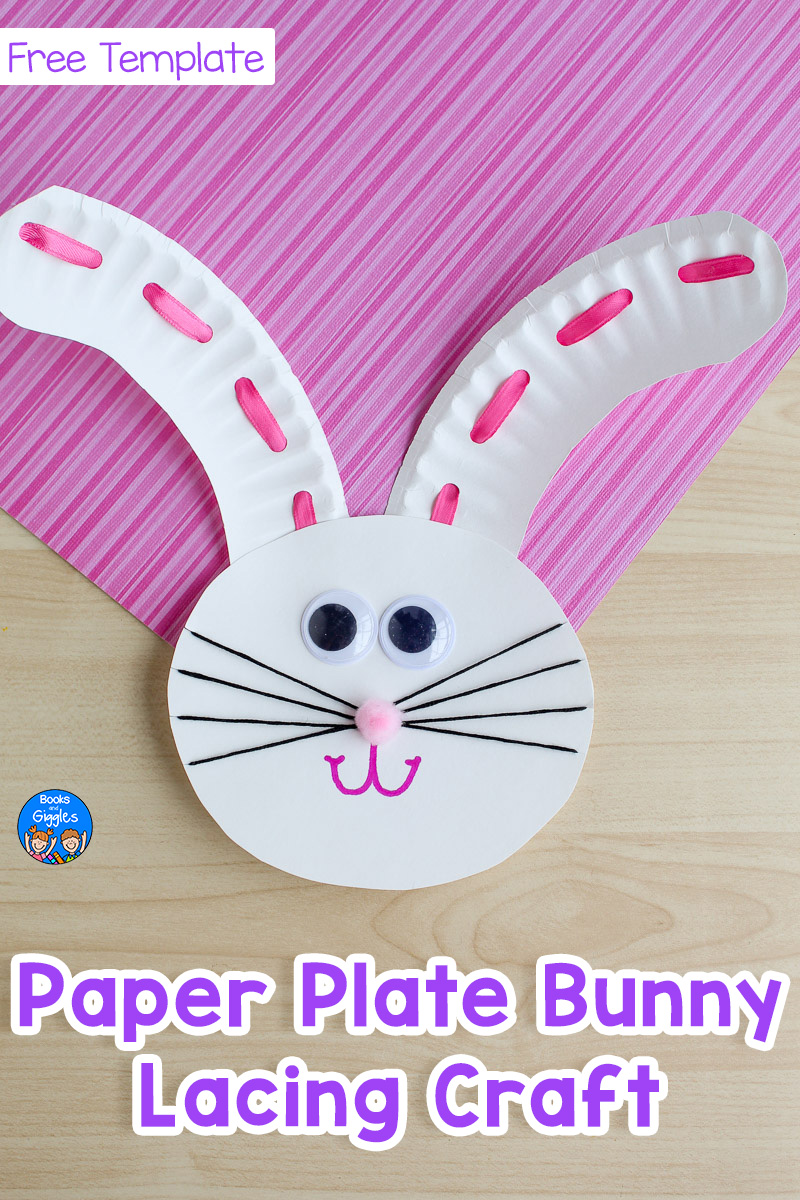
Paper Plate Bunny Craft (with Free Template)

This cute paper plate bunny craft is fun for little hands to make – and helps them practice their fine motor skills too. Time to get ready for the Easter bunny!
Spring is still weeks away as I write this, but I’m dreaming of flowers, pastels, and of course bunnies.
I wanted to create a craft that your littles would enjoy the process of making – but that still would make a cute display or even a puppet.
To make that work all in one craft there’s a little bit of easy prep on your end – but not too much, I promise! The payoff is a fun threading and lacing activity and a play-with-able result.
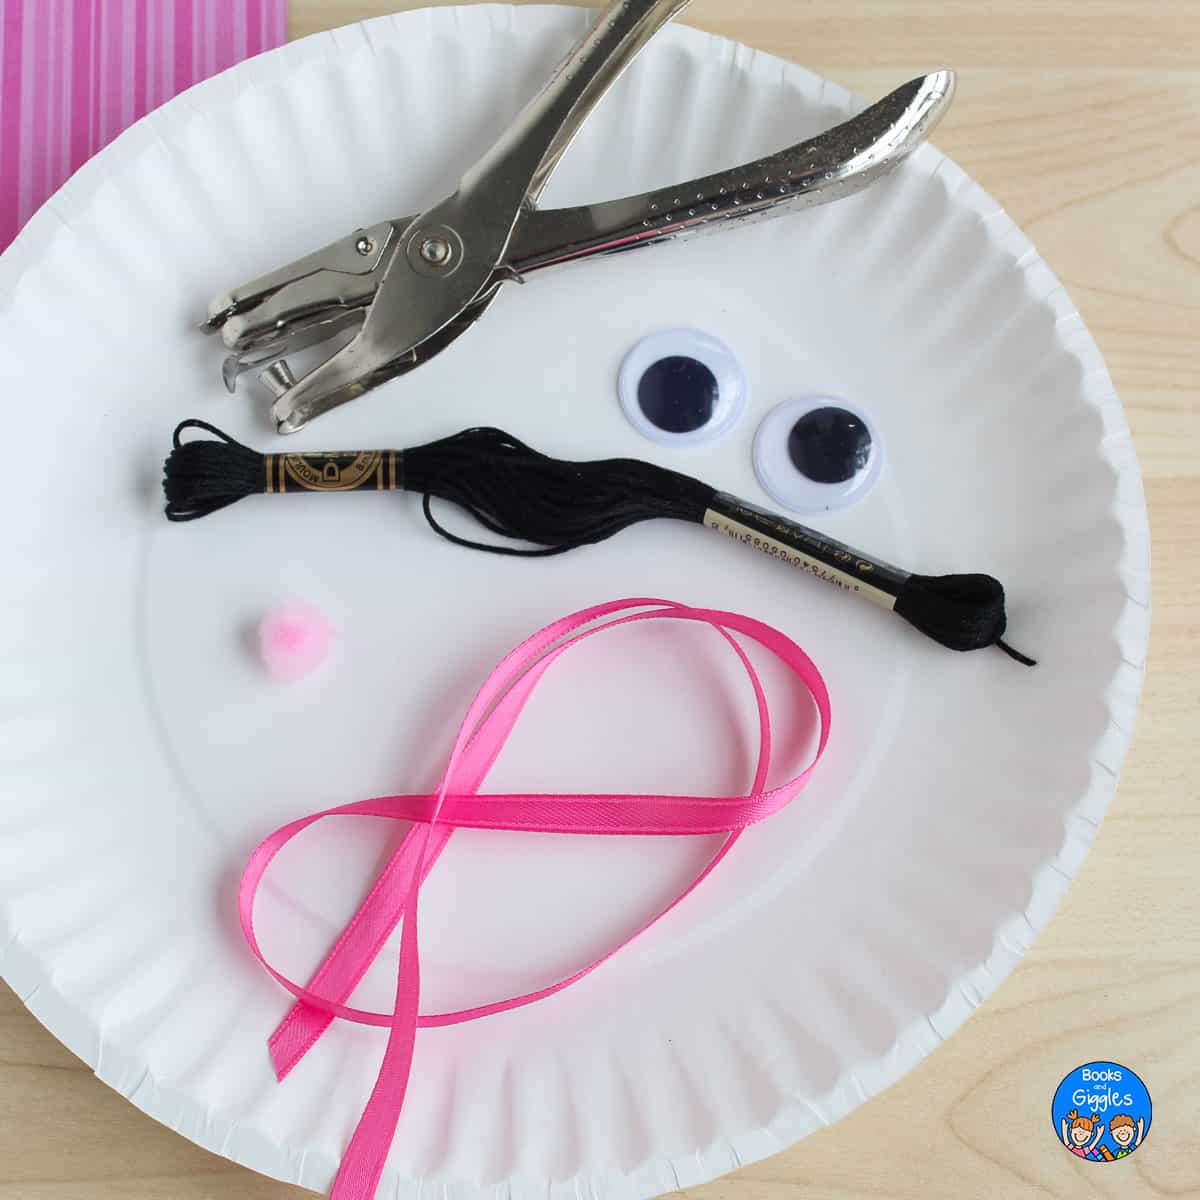
Materials
There’s some flexibility in what materials you need. Use what you have! Here is what I used:
Materials Specific to this Craft
- 9-inch paper plate (the cheap kind is perfect)
- 42-inch long piece of black embroidery floss/thread (yarn would be ok here too)
- 16 inches of 1/4-inch-wide pink ribbon (yarn or even a pipe cleaner could work too)
- Large googly eyes
- Pink pompom (in a pinch you could just cut out a little circle of pink paper)
- Hole punch
- Jumbo craft stick (optional – if you want to make it into a puppet)
Basic Craft Supplies
You’ll also need to get out these basic craft supplies:
- Scissors
- Pencil
- Pink marker (for drawing the bunny’s mouth)
- Tape
- Glue
Preparation
You may want to complete the following steps ahead of time, especially if you’ll be making paper plate bunnies with a group of children.
If you want a little help you can scroll all the way to the bottom of this post to grab a free printable template. I think it’s faster just to do everything freehand though!
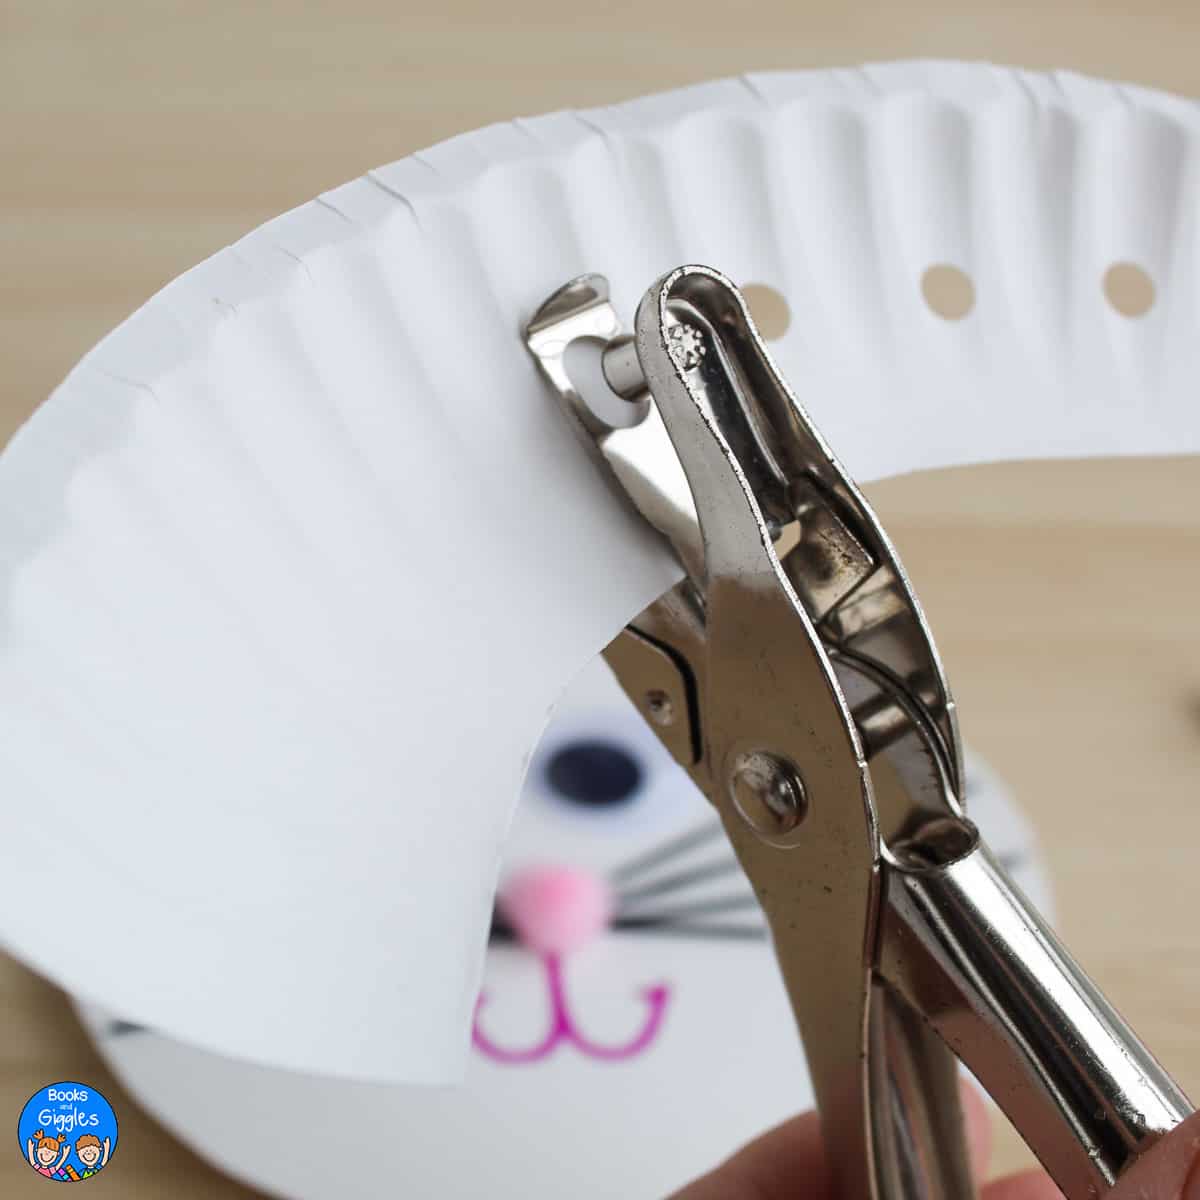
- Cut the rim off the paper plate, and then cut that into two bunny ears. Discard the scraps.
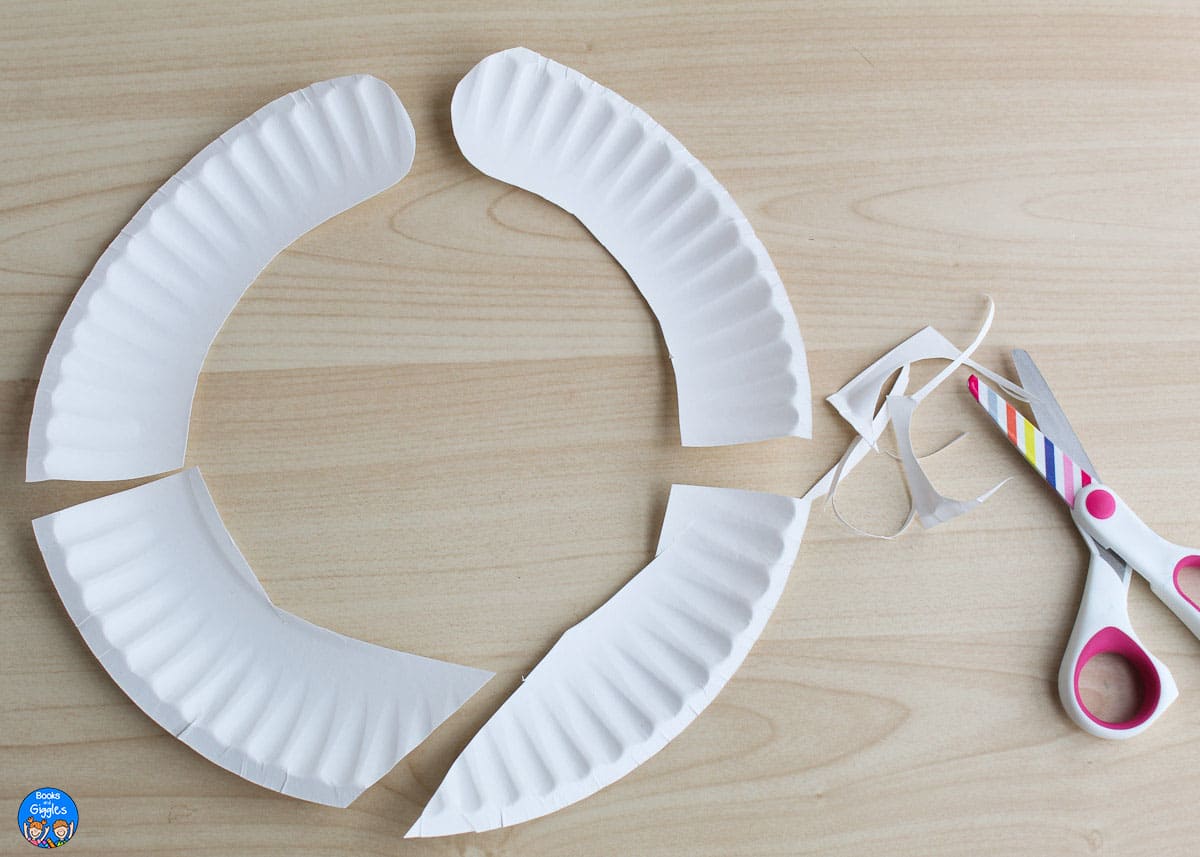
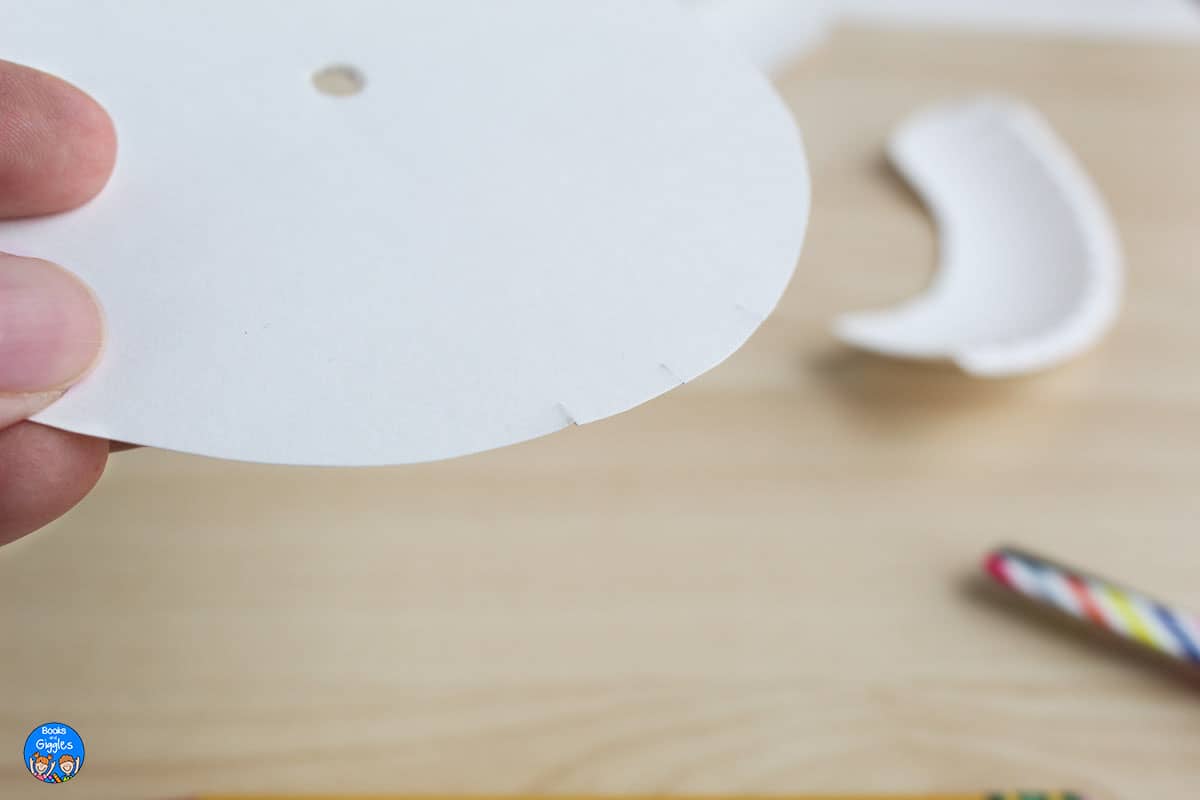
- Cut the center of the plate into a slight oval shape.
- Use a pencil to carefully poke a hole where the bunny’s nose will be. Make sure you don’t poke yourself!

- Cut 4 small slits on each side of the face. Mine were about 1/4 inch long.
- Measure out the embroidery thread and the ribbon, and tape the ends of each piece so that they look like the end of a shoelace. This will make it easier for the child to lace their bunny’s whiskers and ears.

Kids Craft Instructions
Now the fun starts!
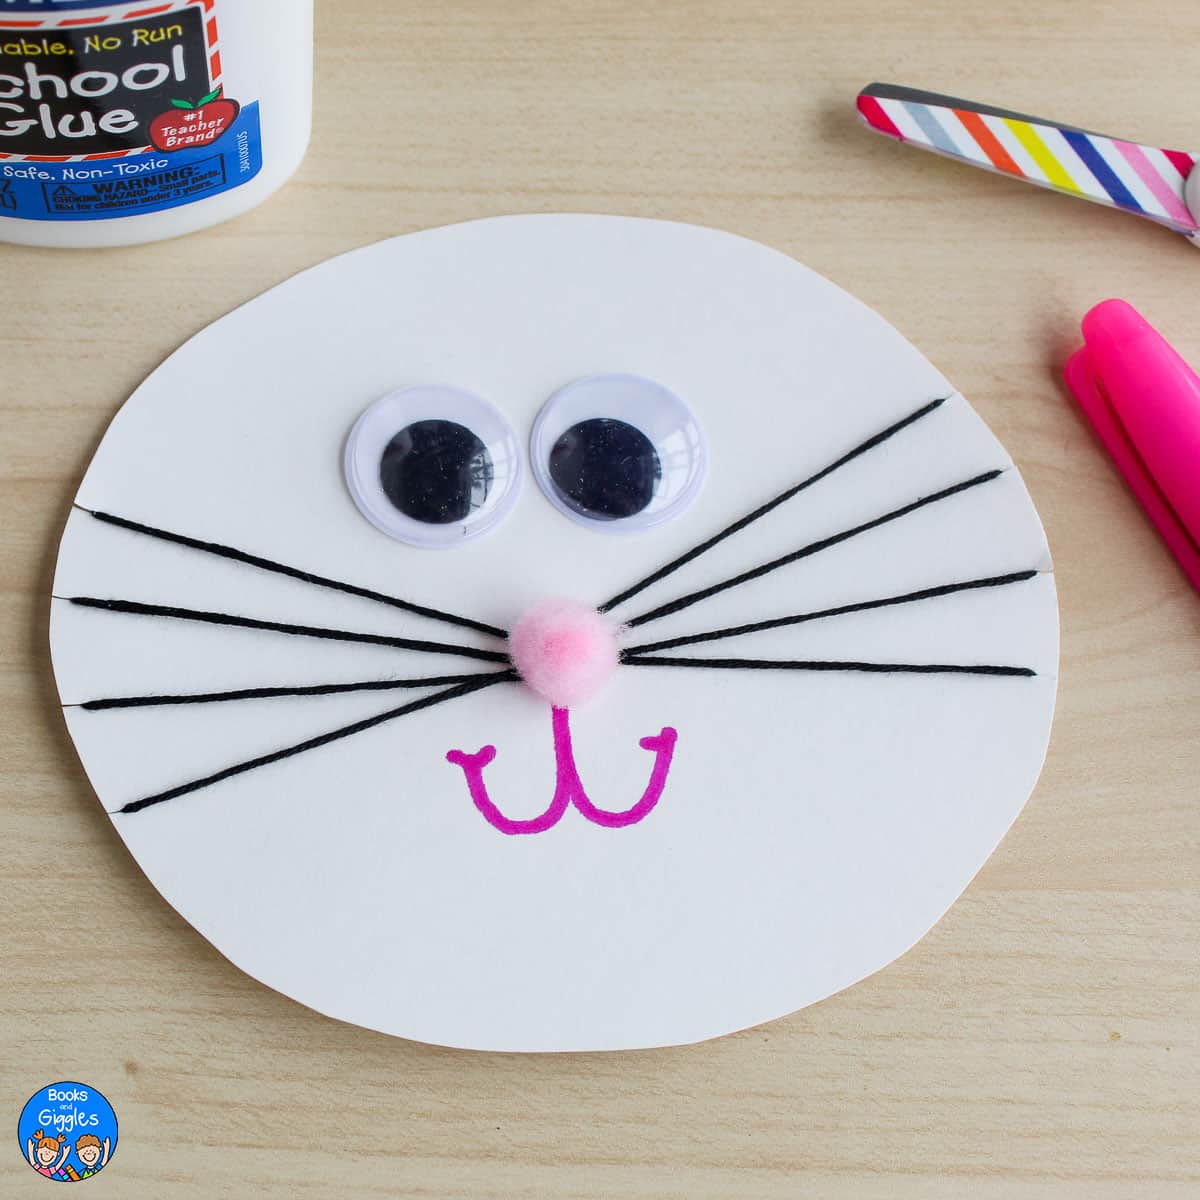
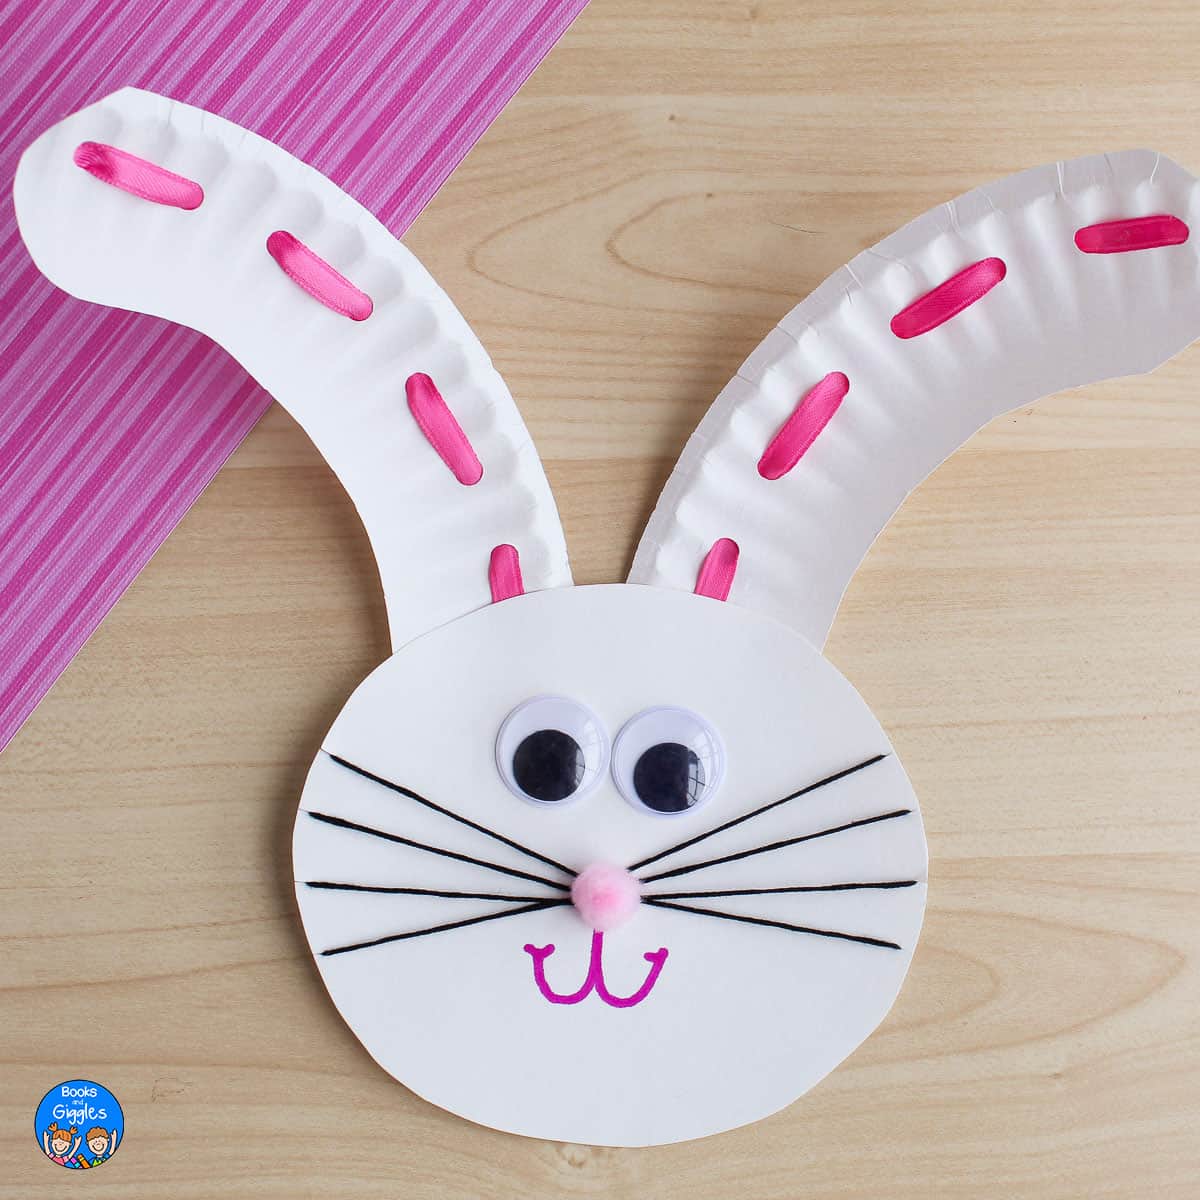
- Start by making the whiskers. Wind the black embroidery floss from the side slits to the center. It doesn’t matter what order you work in, but stop after about 3-4 whiskers per side. Tuck and/or tape the end down on the back.

- Draw the mouth.
- Glue on the pink pompom nose and the googly eyes. Let dry.
- Hole punch along the ears. I made 8 holes per ear.
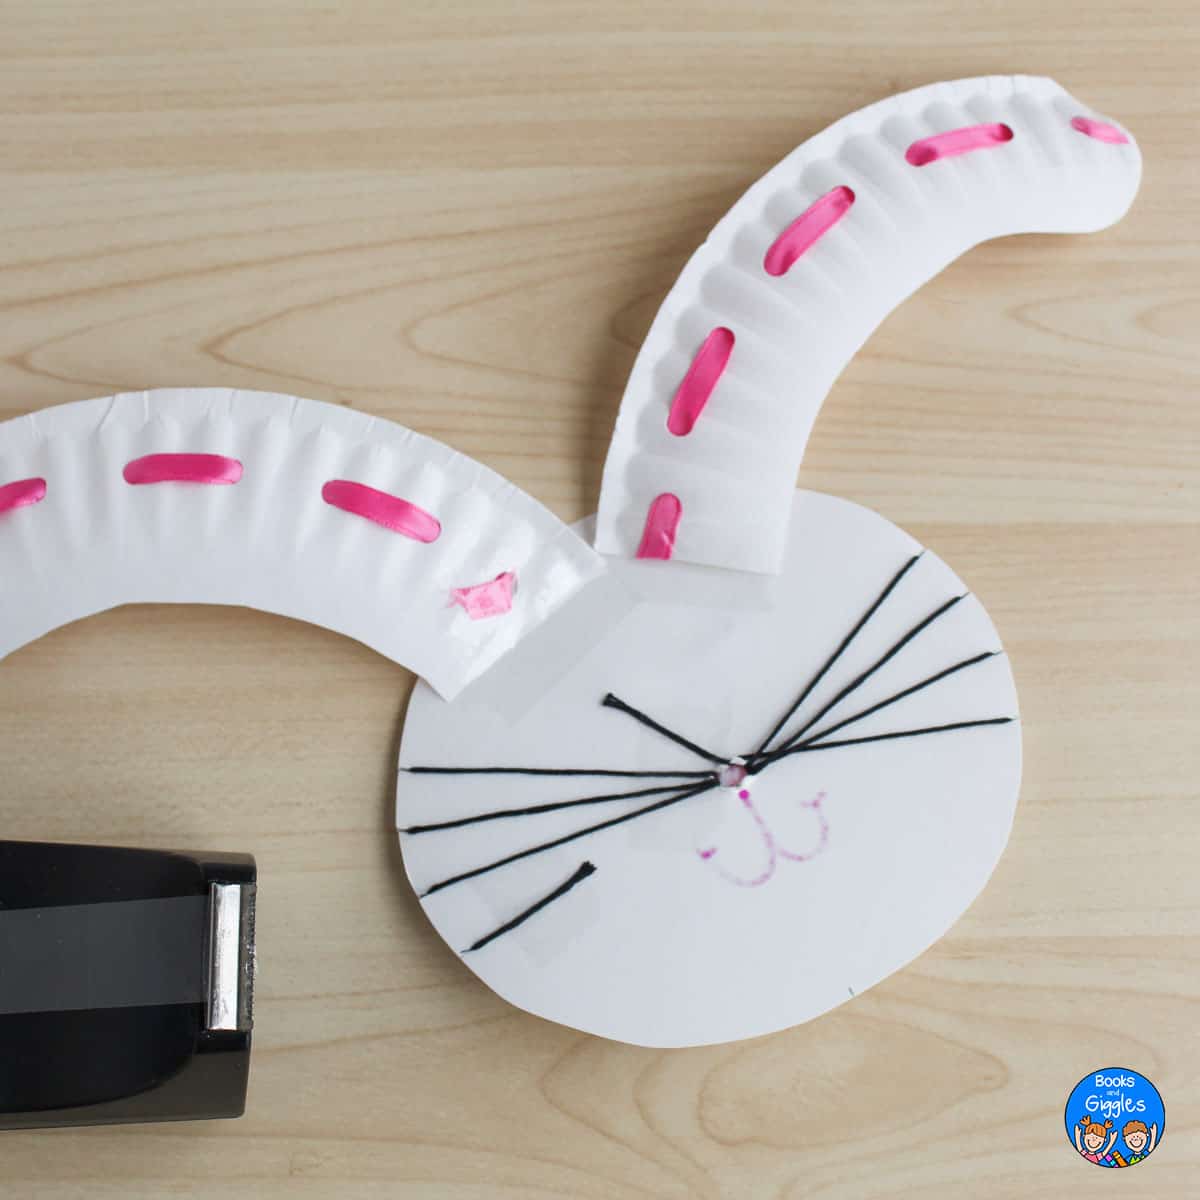
- Next, weave the pink ribbon through each ear, starting at the top. To make it a little easier, you can tape the end of the ribbon to the back of the ear. When you’re done, secure the other end of the ribbon to the ear with tape too.

- Tape the ears to the back of the head. They should be curving away from each other (unless you have a child who has strong feelings about doing it their own way – that’s fine too!)
If you want to make your bunny into a puppet, then also tape a craft stick onto the back. I’m sorry I didn’t take a picture of it that way. I did try it out, and the craft is stiff enough for it to work well.
Here’s my bunny all ready to play –
If you want to work with a template instead of just cutting freehand, you can grab the free template right HERE. You’ll want to set the orientation to Landscape and turn off “Print headers and footers” to get it to fit on one letter-size sheet of paper. It is sized for a 9-inch paper plate.
Want to try some more fun Easter activities to go along with this craft? You can learn how to make Easter Bunny footprints, read a bunny book, or try out our Easter ABC watercolor worksheets.