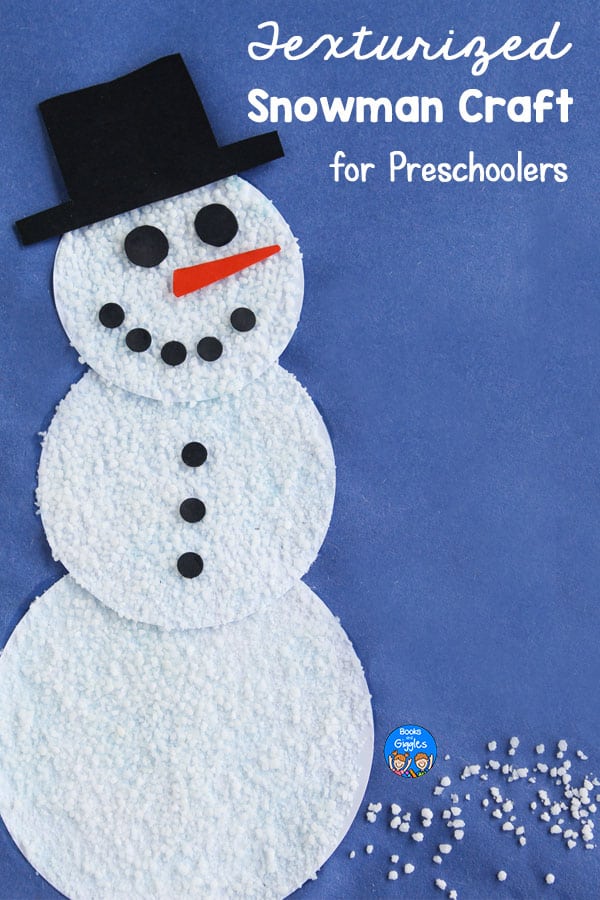
Preschool Snowman Craft
Inside: This preschool snowman craft is made with a surprising ingredient that gives it a fun texture and helps it look extra snowy!
We almost never get snow here, but when we do, practically the first thing my kids want to do is build a snowman.
It might be my fault.
A few years ago, we had a rare inch or so of snow. The problem was, it fell in the wee hours of the morning. I knew it would melt soon.
So I woke my three kids up before dawn and told them to put on coats and shoes. We had snow! And there in the dark, in our pajamas, I taught them how to roll snowballs and make a little snowman.

Most years, though, we’re stuck with just snowman crafts and reading children’s books about snow.
The craft I’m sharing with you today is best for preschoolers (and my own kids are well past that age now). I hope you and your littles have lots of fun with it!
Materials
The surprising craft supply here is what I used for snow. . . .
I dug into my pantry and found a box of dried tapioca mix. It looked like it would make great taste-safe craft snow. I tried it out, and it was easy to work with and clean up, and easily stuck to the glue.
Alternatively, I saw a bag of styrofoam bead “snow” at my dollar store recently – that would probably work too. However, I’m guessing it might be harder to clean up because those tiny beads will roll everywhere. And it’s definitely not taste-safe.
So here’s what you’ll need:
- Granulated tapioca (such as Kraft Minute Tapioca)
- Optional: Empty spice shaker to fill with tapioca
- White cardstock
- Optional: circle cutter
- Scissors
- Black and orange paper for accents
- 1 sheet of background paper
- Glue or glitter glue
- Optional: blue paint
- Paintbrush
- Optional: hole punch
Instructions
If you’ll be making this preschool snowman craft in the classroom, you may want to prep ahead steps 1 and 2, and cut out the pieces for step 5. Also, if you’re using a shaker, go ahead and fill it with tapioca.
- First, cut out 3 sizes of circles. You can do this using a circle
cutter, or by tracing round objects and cutting by hand.

- For this next step, you can use blue glitter glue or you can mix a drop of blue paint into regular white school glue.

- Now, paint each circle with glue and sprinkle with the tapioca. Let dry, and then shake off excess.

- Next, glue the circles onto a background sheet of paper to form a snowman.
- Finally, cut out a hat, buttons, and features, and glue them to your snowman. I used a hole punch to get the mouth and button circles, and I cut the eyes by hand.

Give it plenty of time to dry flat, and then let your children proudly display their work.
Make it Educational
While you’re crafting here are some things you can talk about:
- How tapioca turns to pudding
- How the tapioca is different from real snow
- Discuss all the shapes in the collage: circles, triangle nose, and the rectangles that make up the hat
- Count the black circle buttons, smile, and eyes
- The letter S
You might also like to try out making a snowstorm in a jar or a melting snow science experiment.
Or, make a melted crayon snowflake, rhyme with snowflakes, or talk about arctic animals who live in the snow.
Happy Teaching,
Heather